Upgrading Plesk Using Administrator GUI
This is the quickest and easiest way to upgrade Plesk. Follow the steps below, and you will be running the latest Plesk version in no time:
-
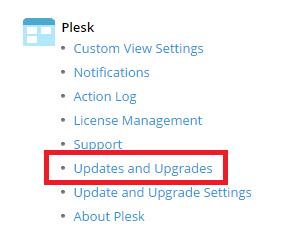
Click Tools & Settings, then click Updates and Upgrades.

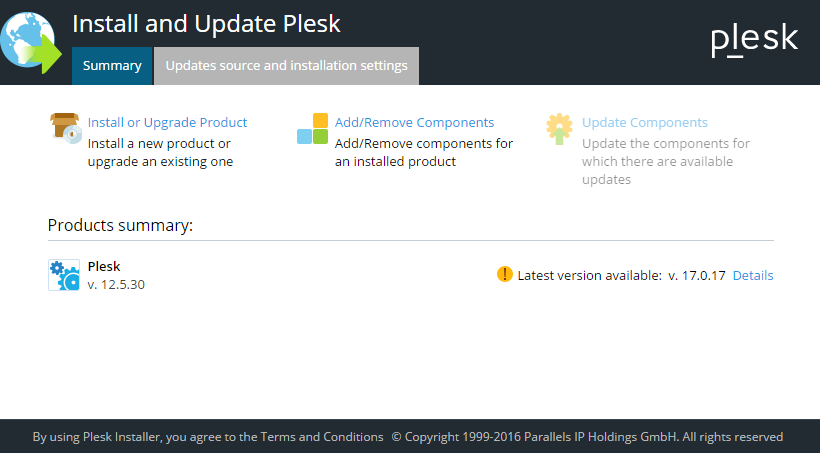
You can see the currently installed Plesk version, as well as the latest available Plesk version, under “Products summary”.
-
(Optional) If you want to change the upgrade settings or the Installer interface language, click Updates source and installation settings (see “Changing the upgrade settings” below).
-
Click Install or Upgrade Product. If the option is grayed out, one of the following is probably true:
- You are already running the latest Plesk version (check the installed Plesk version to confirm).
- The selected release tier is not yet available (see “Selecting a different release tier” below).
- The OS on the server is not compatible with the latest Plesk release (e.g. you cannot upgrade to Plesk Onyx if the OS on the server is 32-bit). See the list of all supported OSes here.
- You are installing from a custom repository in which the latest Plesk version is not available. Try selecting the official Plesk Updates server as the source (see “Changing the upgrade settings” below).
-
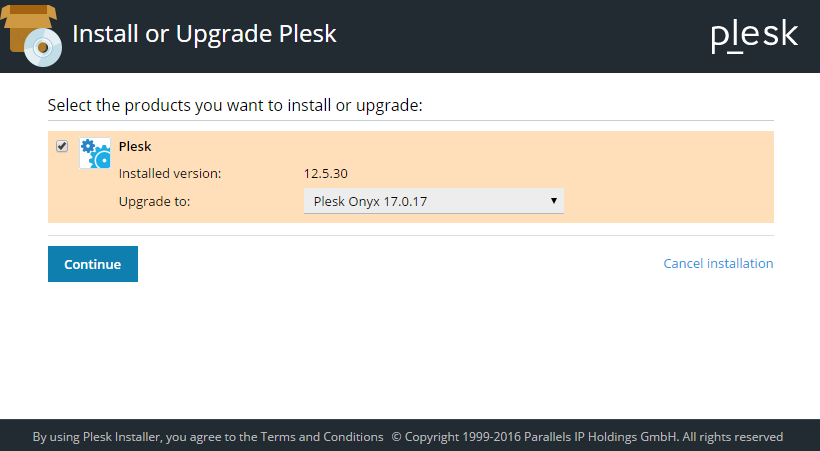
Select the Plesk version to which you want to upgrade from the menu, then click Continue to begin the upgrade.
Selecting a different release tier
By default, this method only allows you to upgrade to the latest stable Plesk release (for an explanation about the different Plesk release tiers, click here). If you want to upgrade to an early adopter release, you need to change the desired release tier as explained below. This method cannot be used to upgrade to a preview (or, as it is called, testing) release. To do so, read Upgrading via the Command Line or Upgrading via the Web GUI instead.
To change the release tier, click Tools & Settings, then click Update and Upgrade Settings. Scroll down to the “Plesk release tiers” section and select the “Early adopter release” option to be able to upgrade to the early adopter release via the Administrator GUI.
Changing the upgrade settings
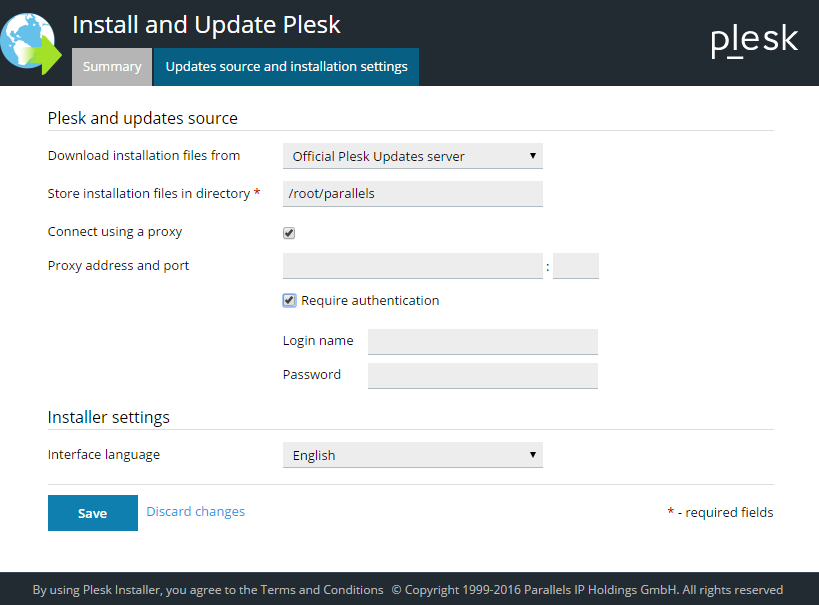
If you click Updates source and installation settings before proceeding with the upgrade, you will be able to change the following settings:
-
Download installation files from lets you choose where the
upgrade files will come from. Select one of the following options:
- “Official Plesk Updates server” (recommended). The upgrade files will be downloaded from the official Plesk repository. This way you can be sure that the files are authentic and free from errors.
- “Mirror server”. The upgrade files will be downloaded from a
server controlled by you or a third party. This option makes the
most sense if you have set up a local mirror. If
you select this option, you need to specify the URL to the
directory containing the
.inf3file in the corresponding field. - “Local media”. Plesk will read the upgrade files from a local
source, such as the server’s hard disk. If your Internet
connection is slow or unreliable, you can pre-download the
installation files and save them locally, then select this option
to upgrade. If you select this option, you need to specify the
absolute path to the
.inf3file in the corresponding field.
- Store installation files in directory allows you to choose the directory on the server to which the files required for the upgrade will be downloaded. Make sure that there is at least 150-200 MB of free space in the specified directory.
- Connect using a proxy must be selected if you plan to use an HTTP proxy server to connect to the Plesk updates server or the local mirror. Specify the proxy server’s IP address and HTTP port in the corresponding fields. If the proxy server requires authentication, select the “Require authentication” checkbox and type in the required username and password.
- Interface language allows you to change the installer interface language.
Click Save once you are satisfied with the selected options to return to the Installer home screen.