Plesk 更新
概要: To make sure you’re not missing out on new Plesk features, quality of life improvements, and important security fixes, you need to keep your server up to date.
In this topic, you will learn how to update Plesk and its services, and also how to configure automatic updates.
To ensure that your Plesk is up to date, automatic installation of Plesk updates is enabled by default. To stay safe and enjoy the latest features, we strongly recommend that you keep automatic updates enabled. Moreover, you can set the desired weekdays and time range when Plesk updates are installed.
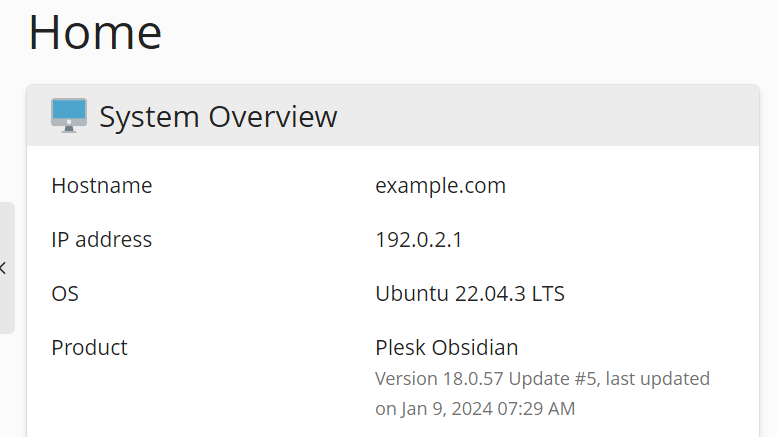
You can see the information about the current Plesk version and available updates on the Home page under 「System Overview」.
Plesk also shows notifications when updates are available or have been installed in the Plesk UI notifications pane.
Plesk 版本
Each Plesk version consists of a name and version identifier. For example, in Plesk Obsidian 18.0.58, Obsidian is the name, 18.0.58 is the version identifier, and the number 58 is Update 58.
Plesk 版本的簡短引用只包括版本名稱,例如 Plesk Obsidian。
更新
Plesk 更新會添加新的功能、增強功能和安全性修復。無論是哪種許可證金鑰,更新都是是免費的,並可用於所有 Plesk 安裝實例,。
Updating Plesk does not change its version. The information about the applied update is added to the product version name, for example, Plesk Obsidian 18.0 Update 58.
備註: Plesk 更新會按順序應用。因此,您無法只安裝某個更新或跳過某個更新。
您可以通過多種方式更新 Plesk:
- 自動(推薦且默認啟用)。
- 手動,使用 Plesk 使用者介面。
- 手動,使用命令列介面。
概要
在 Plesk 中,您可以管理以下元件的更新:
-
Plesk 套裝程式和服務包由 Plesk 打造。後者包括所有的 Plesk 擴展、Kaspersky Anti-Virus、Plesk Premium Antivirus 等等。
請查看下面的 通過使用者介面手動更新 Plesk ,也可以查看 通過命令列手動更新 Plesk 。
-
(Plesk for Linux) 作業系統包。如果打開了 系統更新 工具則可以在 Plesk 中管理其更新和有關更新的通知。
請參閱下面的 手動更新系統和協力廠商元件 。
-
Plesk (Plesk for Linux) 自帶的協力廠商元件,例如 MySQL/MariaDB、PHP、web 伺服器、各個郵件服務,等等。如果您打開了自動更新協力廠商元件功能,這些元件更新可作為系統更新或 Plesk 更新的一部分執行。
備註: 請謹慎使用協力廠商元件的自動更新。託管於您的伺服器上的網站可能會與某個元件的新版本不相容。 系統更新 工具能夠讓您鎖定所選包,而將不再應用任何更新。這就是為什麼會預設關閉自動更新協力廠商元件的原因。
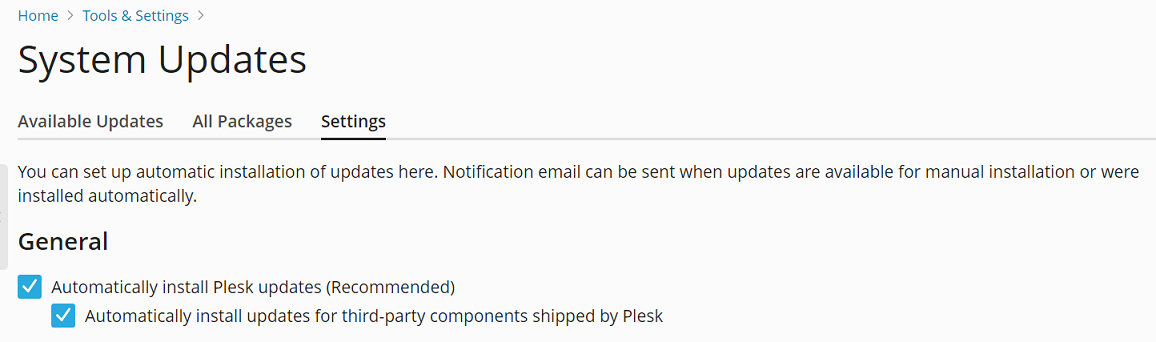
To enable automatic updates for third-party components, go to Tools & Settings > Update Settings (under 「Plesk」) and select the 「Automatically install updates for third-party components shipped by Plesk」 checkbox.
該表顯示了用於更新各個軟體元件的 Plesk 工具。
| 要更新的工具或套裝程式 | Plesk 包和由 Plesk 建立的服務包 | Plesk 附帶的服務包(協力廠商元件) | 作業系統包(Linux) |
|---|---|---|---|
|
系統更新工具。 位於Plesk for Linux中的 工具與設定 > 系統更新 。 |
➖ |
➕
|
➕ |
|
Plesk 安裝程式 進入 工具與設定 > 更新 或通過 命令列介面實現。 |
➕ |
➕
備註:
如果禁用了或不支援系統更新工具,這些元件則由 Plesk 安裝程式更新。 |
➖ |
*例外:由 Plesk 安裝程式交付的更新將會包含協力廠商服務包更新(如果 Plesk 包更新依賴需要這些更新,尤其是當 Plesk 更新解決了重要的安全或穩定性問題時)。
自動更新Plesk 和系統元件
默認,Plesk 將會一天一次檢查更新。若有可用更新,Plesk 會自動下載並安裝。
會在 工具與設定 > 更新設定(在 「Plesk」 下)中預設啟用以下更新選項:
- “自動安裝 Plesk 更新(推薦)”。該選項會使用 Plesk 安裝程式,允許自動更新 Plesk 和其內置的服務。在某些情況下,Plesk 協力廠商元件可以與 Plesk 同時更新。
- (Plesk for Linux) “自動為 Plesk 附帶的協力廠商組件安裝更新”。協力廠商服務可與 Plesk 元件或系統元件同時更新(如果打開了 系統更新 工具)。
預設情況下不會啟用 “自動安裝系統包更新” 選項,且該選項僅適用於 Plesk for Linux。該選項會使用 系統更新 工具,允許自動更新系統包和 Plesk 協力廠商元件。
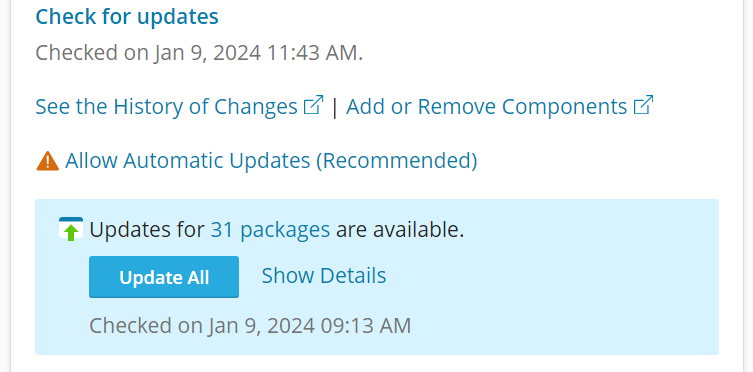
You can see the status of updates and also install updates manually on the home page under 「System Overview」. Alternatively, go to Tools & Settings > System Updates (under 「Server Management」). For details, refer to System Updates.
備註: 如要阻止某些包自動更新,請在包列表中選定它們(在 所有包 中) 並通過點按 鎖定 來鎖定它們。注意只有在使用 系統更新 工具的情況下才能實現此操作。
If you disable automatic Plesk updates, the home page will prompt you to allow automatic updates.
設定自動安裝 Plesk 更新的時間
您可以設定自動安裝 Plesk 更新的預期工作日和/或時間範圍(開始和結束時間)。
這在以下幾種情況中很有用:
- 您想要遵循主機提供商採用的更改管理流程(例如,所有更新必須在辦公時間外/內安裝)。
- 應法律要求您要提前通知伺服器所有者 Plesk 的宕機時間。
- 貴國的立法規定電信公司必須在更新期間執行某些流程。
您可以管理何時自動安裝 Plesk 更新:
- 針對單台伺服器。此種情況請查看下面的說明。
- 針對許可證的集群。通過 KAPC 執行此操作。在此文中瞭解更多。
若要指定自動安裝 Plesk 更新的預期工作日和時間範圍,請如下操作:
按照下面的模式添加一項到 panel.ini 文件:
[updates]
updateDays = weekday1,weekday2
timeFrameStart = hour
timeFrameEnd = hour
備註: 您必須在 UTC( 世界協調時間)中至少指定兩個工作日和/或小時(將您所在的本地時間轉換為 UTC)。
備註: 您可以分別指定 updateDays 參數和 timeFrameStart 與 timeFrameEnd 參數對(僅指定工作日或僅指定時間範圍)。但是,您無法單個使用 timeFrameStart 和 timeFrameEnd 參數。您必須同時指定兩個參數以設定時間範圍。
例如,如果您將以下登入添加到 panel.ini 文件
[updates]
updateDays = saturday,sunday
timeFrameStart = 11
timeFrameEnd = 18
將只在週六和周日 11 和 18 小時 (UTC) 之間安裝 Plesk 更新。
備註: 指定的時間範圍設定了開始安裝更新所需的時間間隔,但並不保證更新的安裝將在該間隔內完成。
通過使用者介面手動更新 Plesk
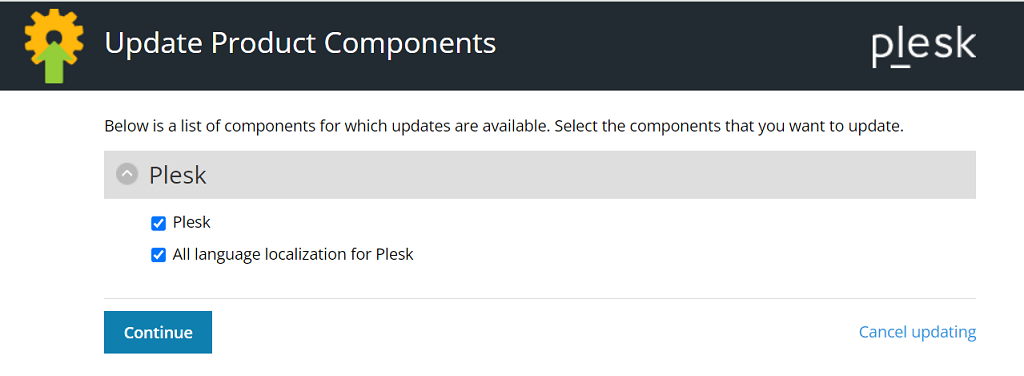
You can update Plesk and third-party components by clicking Tools & Settings > Updates (under 「Plesk」), and then going to the 「Update Components」 tab. Here you can select particular components that have available updates and click Continue to update them.
通過命令列手動更新 Plesk
若要安裝當前 Plesk 版本內的所有可用更新(包括 MySQL/MariaDB 或 PHP 等元件的更新),請使用以下命令:
plesk installer install-all-updates
如果您只安裝 Plesk 更新,請使用以下命令:
plesk installer install-panel-updates
在此情況下,MySQL/MariaDB 和 PHP 等的元件不會被更新,除非某些 Plesk 功能需要更新這些元件。
更改更新安裝目錄並使用代理連接
您可以更改 Plesk 安裝程式下載其檔的目錄(預設的安裝目錄是 /root/parallels)並/或使用代理伺服器連接。
-
轉到 工具與設定 > 更新(在 「Plesk」 下)。Plesk 安裝程式將在新的瀏覽器視窗或標籤中打開。
-
如果 Plesk 安裝程式開始下載更新,並且目前只想更改設定,請按一下取消。
-
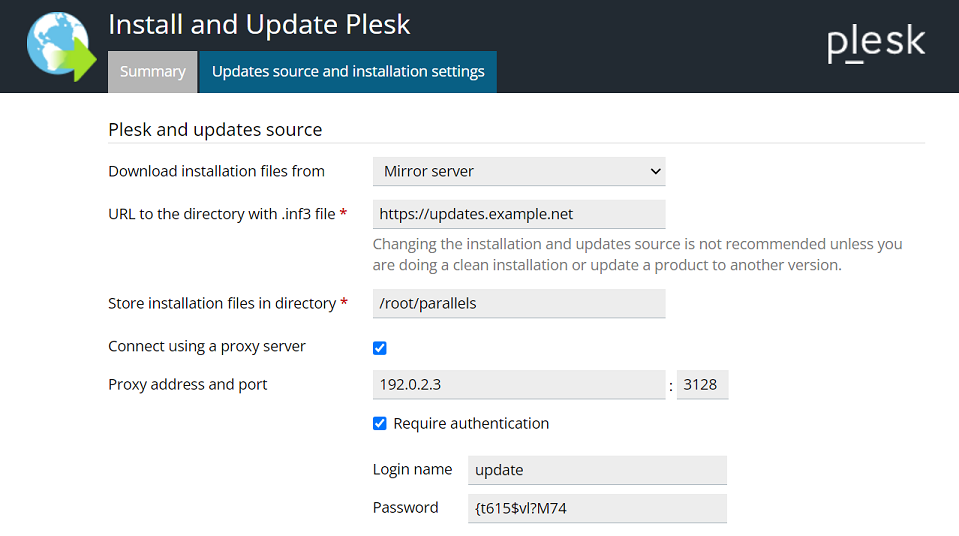
轉到 「更新源和安裝設定」 標籤執行以下操作:
- 將預設的安裝目錄
/root/parallels更改為自訂的目錄。 - 如果使用代理伺服器,則選擇“使用代理連接”核取方塊,在相應欄位中指定代理主機名稱和埠號,如果代理伺服器需要身份驗證,則選擇“需要驗證”核取方塊並指定用戶名和密碼。
- 將預設的安裝目錄
-
按一下 保存 保存設定。

Using the Plesk Port for Installing and Updating Components
In Plesk Obsidian 18.0.57 and earlier, for installing and updating Plesk components to be possible, the TCP port 8447 had to be opened in the firewall. However, when running Plesk in the cloud, opening a custom port in the firewall may be complicated or even impossible.
Starting from Plesk Obsidian 18.0.58, it is possible to install and update Plesk components without opening the TCP port 8447 in the firewall. This is done by configuring Plesk to proxy requets to Plesk Installer via its own port. Effectively, Plesk Installer uses the same port used by Plesk.
Configuring Plesk Installer to use the Plesk port:
- 登錄到 Plesk。
- 進入 工具與設定 > 更新設定(在 「Plesk」 下)。
- Select the 「Access Plesk Installer via the Plesk hostname and port」 checkbox, and then click OK.
Plesk Installer will now use the Plesk port instead of the TCP port 8447.
You can also configure Plesk Installer to use the Plesk port via the CLI by running the following command:
plesk bin settings --set installerProxyMode=true
To have Plesk Installer use the TCP port 8447, either clear the 「Access Plesk Installer via the Plesk hostname and port」 checkbox, or run the following command:
plesk bin settings --set installerProxyMode=false